Thursday 31 May 2012

Uh-oh...Paper Smooches Blog Hop

This is a card that I created for the "Inspired By"challenge blog, back in March. I did not manage to make the dead-line, so never posted the photo. However, this week, Paper Smooches has its June release sneek peak. They are hosting a blog hop with a random drawing for free stamps. As I won this stamp set, Zoo Crew, during a previous sneek peak it seemed appropriate to feature both the card and the opportunity with you all.
The inspiration photo was a child's growth chart, with a tower of animals.
My card, with its curved base, is a home-made "wobbler."  Wobbler cards are kits sold by KANBAN company; you can see a webisode on them using THIS link. They feature animals and have a rocker base.  That tower of animals just didn't seem too stable, hence the "uh-oh" sentiment.

Here's a couple more pictures of those adorable animals:

So get yourselves over to the Paper Smooches blog site, and join the HOP!

Tuesday 29 May 2012

Merci BOW-coup--CFC54


My new BOW-die from Lil' Inker arrived today, and I could not resist making up a few.  I just love dies that result in a dimensional item!
The perforated detail on these bows looks just like stitching, and they go together with just a few Glue-dots. You can also cut them out of felt (see Debby Hughes' example HERE), and I bet they'd work with fabric backed with iron-on stiffener.


That made me think of a bow-tie, and that reminded me of this week's challenge at CAS-ual Fridays: a masculine card using designer paper.


I have already submitted one item for this week's challenge, but that bow-tie was just so appealing. I had seen a man's shirt (black-tie, another gorgeous Debby Hughes creation) done using the Bow Die and because we speak French here in Canada, this idea was born:


How perfect is that punny sentiment!?
The stamp is from a French "thank-you set" by Close to My Heart.  Striped DPs are "Cherry-O," also from Close to My Heart.  Some old shirt buttons and pen-stitching completed this shirt-front.


One more view of that dashing dimensional BOW...

Monday 28 May 2012

I {heart} Dad

I am submitting this card to a couple of challenges this week:  Retro Sketches Challenge #13, with this sketch as inspiration
and the CAS-ual Friday Challenge CFC54, where the idea is to create a masculine card, using designer paper.

Closer to home, my inspiration for this Father's Day card came from the beautiful quilted wall-hanging my friends made when I left Milwaukee:
Isn't it gorgeous?  I was also impressed by a series of quilt-inspired items created recently by Miriam Prantner (see her blog HERE). "Quilting" using paper is so much quicker and easier than using fabric!


At CAS-ual Fridays this week, the DT was using a masculine paper pack from Gina K (check out the details and samples using THIS link). I used a mish-mash of paper scraps from Close to My Heart, Sizzix and Paper Wishes "Noted"(that fabulous herringbone pattern) which resembled men's shirts. I first crumpled them up to give more of a sense of texture, then machine-stitched them to a cardstock heart. This was trimmed with deckle scissors to give a frayed look to the edge, as in raw edges of the original quilt.
Now that its finished, it doesn't look quite so Clean and Simple as intended...oh well!

I replaced the scallop at the bottom of the sketch with the die-cut letters "Dad." I used hemp for a bow and kraft paper for the background.
Now that my sewing machine is sitting on the craft table, I ought to tackle one of my unfinished quilting projects...maybe in time for Father's Day?

Saturday 26 May 2012

Spring Birthdays & Templates

Calorie-free cake, using Playful Pockets template
Spring is the busiest time of the year for birthdays in our family. Great reason/excuse to spend time at the craft table. Today I am featuring another product from one of my fave craft-supply companies, Paper WishesTemplates.  They are designed and produced in-house (made in America!) Templates are much less expensive than dies, and if you don't mind spending a little more time and using your scissors (its therapeutic!) they are a great option.

The design for this card was copied directly from the Paper Wishes website, and uses the fabulous double-sided paper pack "Kaleidoscope," and the "Playful Pockets" template. The lower cake layer is a pocket that could hold a gift-card or extra greeting. The sentiment stamp is "birthday4you" from The Stamps of Life; Stickles on the candle; all other supplies, Paper Wishes.

Here's a look at the template: it is translucent so you can see exactly where you are placing it, on patterned paper (here its been placed on black paper so you can see the cut-away areas). You just place the template over your paper or card-stock, trace the outline with a pencil through the slits provided, then cut it out. To create the pockets, just fold on the lines indicated. This works particularly well with the double-sided paper--no need to cover the white/back with more paper. There are plenty of instructions and designs ideas included on the template, as well.


This second card uses the Layered Labels template,
the Celebration papier tole and the  Confetti paper pack.
One nice detail about the Paper Wishes paper packs is that they provide a free download of coordinated tags and labels that you can print out at home, to use on your card and scrapbook projects.
Again with this design, I shamelessly copied a project from the website (this was made during my recuperation from a week-long illness--not feeling capable of originality...). The scalloped circle is a Nestabilities die.


Here's a look at the inside of the card:  more use of the Layered Labels template, "pink sorbet" twine from The Twinery, extra artwork from the papier tole sheet and sentiment stamp from The Stamps of Life.


A peak at the different designs on the Layered Labels template, and the dimension on the front of the card.


So there's my plug for non-technical tools! I love my Cricut and Big Shot, but sometimes can scissors do the job as well.


Friday 25 May 2012

Snail Mail...Whimsie Doodles May 2012 Challenge

In just under the wire here with my second submission to the Whimsie Doodles Challenge for May 2012: Bump It Up. The challenge was to use scoring or dry-embossing on a project.

For this card, I aimed for CAS, and a literal interpretation of the sentiment. The "grass" was created by first turning the card over onto a foam mat and drawing grassy clumps with a scoring tool, then returning it to the right side and swiping with an ink pad to emphasize the scoring.
The snail image was printed on patterned paper (CTMH Dotty for You), high-lighted with markers and attached to the card base with foam tape. I'm pretty sure the snail was a freebie from Whimsie Doodles, but now that I've gone back to verify, I can't locate it on the site! Oops and apologies...
The envelope was made by scoring and folding a scrap of paper with a little inking on the edges for definition. The kite tail uses little bows of twine from The Twinery.

Wishing you a warm, kite-friendly weekend!
Happy Memorial Day to all my US buds.

Monday 14 May 2012

Bump it Up Challenge--How ARE Ewe?


I've been exploring the world of down-loadable digi stamps, and found this adorable image from Whimsie Doodles. The designer is Melyssa Connolly who also creates stamp sets for There She Goes Clear Stamps.
The Whimsie Doodles blog sponsors a challenge every month, and the one for May is to "Bump it Up!" by including embossing on your project.
I purchased the "Ewe" which includes the image and sentiment and started experimenting with printing it out in various sizes on plain printer paper. If you open the image in a Word or other document  program, it is easy to re-size.
Once I had a size I was happy with, I printed it out on cardstock. I printed the fence on some barn wood paper (from Paper Wishes, a bargain at 49 cents!), by taping a scrap of the paper over the where the image would be printed. I coloured in the sheep with markers.

Here is the card:


I used a couple of Sizzix embossing folders for the "hills" as well as some textured card stock.
Melyssa posted a great card with similar hills and buttons as part of the There She Goes "Mother of All Blog Hops" this past weekend, so I'm giving credit where it is due!
For the sky, I inked some 'Heavenly Blue' (CTMH) card stock, then turned it over and "drew" some clouds with an embossing stylus. I turned the paper back to the right side and lightly sanded that part to reveal the white core.
The upper part of the card may need SOMETHING more, but I'm not sure what, so rather than kill the project, I'm leaving it like this.

My mom LOVES sheep, so this will probably end up being sent to her at some point.


Here's the sentiment on the inside of the card:

Just used a scrap of the embossed paper, matted the sentiment on black and added a button tied with embroidery floss.


It was pretty easy and very satisfying to create with digital stamps!

Saturday 12 May 2012

MOABH 2012: Uh oh...Nursebot!

Happy Mother's Day!
And welcome to the 3rd annual Mother of All Blog Hops sponsored by There She Goes Clears Stamps!   I am thrilled to be amongst the customers and Trendsetters who get to showcase some of their favorite There She Goes Clear Stamp sets. Get ready to be inspired! Not only will you get some great ideas, you have a chance to win some FABULOUS prizes!
To find out how, please go to the There She Goes’ blog and read the simple instructions.

Laughter is the best medicine...and "Nursebot" is sure to make you chuckle! 

This set by Torico has several cute images, fun accessories and a variety of sentiments, which lend themselves to many different themes--get well, buck up, get over it...


Patterned paper: Dotty for You by CTMH
Die: Nestabilities "Label #2"
I used the little pill stamp to create the patterned paper on the front of this card, stamped a  sentiment on the inside, and created a border  of  pill bottles.
The adorable Nursebot is featured on the flip section of the card, coloured with markers, and popped up with foam tape.


You will want to see the rest of today's outstanding cards; don't forget to comment as you hop, for your chance to win one of the very generous prizes.


Please click on the InLinkz below and follow it to the next blog!


If you have a few spare moments, I've included instructions on how to make the flip-card.

Flip-card Tutorial
Flip cards are all the rage just now, and you don't need a special die to make them. You can use any framelit-style or nestability/dienamic die. The key is to cut only part of the die at a time. 

Step 1: Centre your die/cutting mat on the 1st score line
For my A2 card, I cut a piece of cardstock at 5-1/2" by 6-1/4"and scored it vertically at half the width of the finished card (in this case, at 2-1/8" for a 4-1/4" card), and again at 3-1/8"(1" away from the first score line). 
Then I placed my die centred on the first score line, and lined up the edge of the cutting pad at that line.
I actually measured and marked the centre of the die for accuracy, after wasting some paper just eye-balling it...


Step 2: Cutting mat lined up with 2nd score line


After running that through the machine, I carefully turned the cardstock 180 degrees without disturbing the paper & die (sticky notes can be useful to keep everything in place); the second cut is made with the cutting pad lined up with the second score line.
In these photos, ignore the shadow of the cutting pad--the edge really is lined up with the score line.


Step 3: fold on 2nd score line
Next, fold the card forward on the 3-1/8" score-line, being careful not to fold the die cut section.


Step 4: fold front back on 1st score line
Finally, flip back the front section of the card, folding on the 2-1/8" score line, again leaving the die-cut shape intact. You will want to cover the die-cut shape with another layer to hide the score lines. Pull the two sides of the card apart, and your die-cut shape flips over, revealing a message or image on the inside!

Have fun creating!


PS Sparks Challenge--May 7-13, 2012 & CFC52


A quick posting of my entry to the Paper Smooches Sparks Challenge. There is now a new challenge every week with a different theme, which means lots more inspiration, opportunities for prizes and just general fun with those Paper Smooches images and sentiments! Check out the details HERE.
 This week's Trend Watch challenge was to feature something from the SKY, with reference to this image:

I just love this digital image: (which you can find HERE)
The expression on that face...
The little owl is so easy and so much fun to paper-piece.


For my card, I created a tree trunk to attach the branch to, printed the owl out on textured paper, and added a little shading with markers. He is silhouetted against the moon in the NIGHT SKY (kraft paper); a few star Dazzle stickers and a lovely dotted ribbon (foliage?) complete the scene.


I have not added a sentiment yet--haven't decided WHO to send it to!

The challenge closes Sunday night, May 13th, at midnight, so there is still time to join in. Look for a new challenge this coming Monday.

**I am also submitting this post to CAS-ual Friday's CFC52--BIRDS.**

Sunday 6 May 2012

Kits! Featuring Papier Tole

In my post yesterday I mentioned that I had been "under the weather." A sure sign of illness is no inclination whatever for crafting...so sad.
To get the creative juices flowing again, I took out one of my craft kits from the awesome company, Paper Wishes.  As well as selling popular items by other craft companies, they make their own line of 12x12 papers, Dazzles stickers, stamps, and unique to the crafting world, as far as I know, Papier Tole. They also produce weekly "Webisodes," showcasing trendy items, techniques and ideas to inspire you.

I mentioned craft kits: they offer a whole series of monthly or every-two-monthly kits with such themes as scrap-booking, card-making, jewelry-making, paper-crafting, girls-create, stencilling, etc. I receive their Papier Tole kit every other month, which usually contains materials for at least 4 projects.

This card is one of them. The papier tole is like those old Holly Hobby images where you cut and layered parts of the image for a 3-D shadow-box effect. However, no cutting required (its all die-cut) and the images range from soft and romantic to vintage to funky foil with amazing embossing to the intriguing pyramid images...you should really take a look HERE. The sheets are so reasonably priced, easy to use and produce great results.
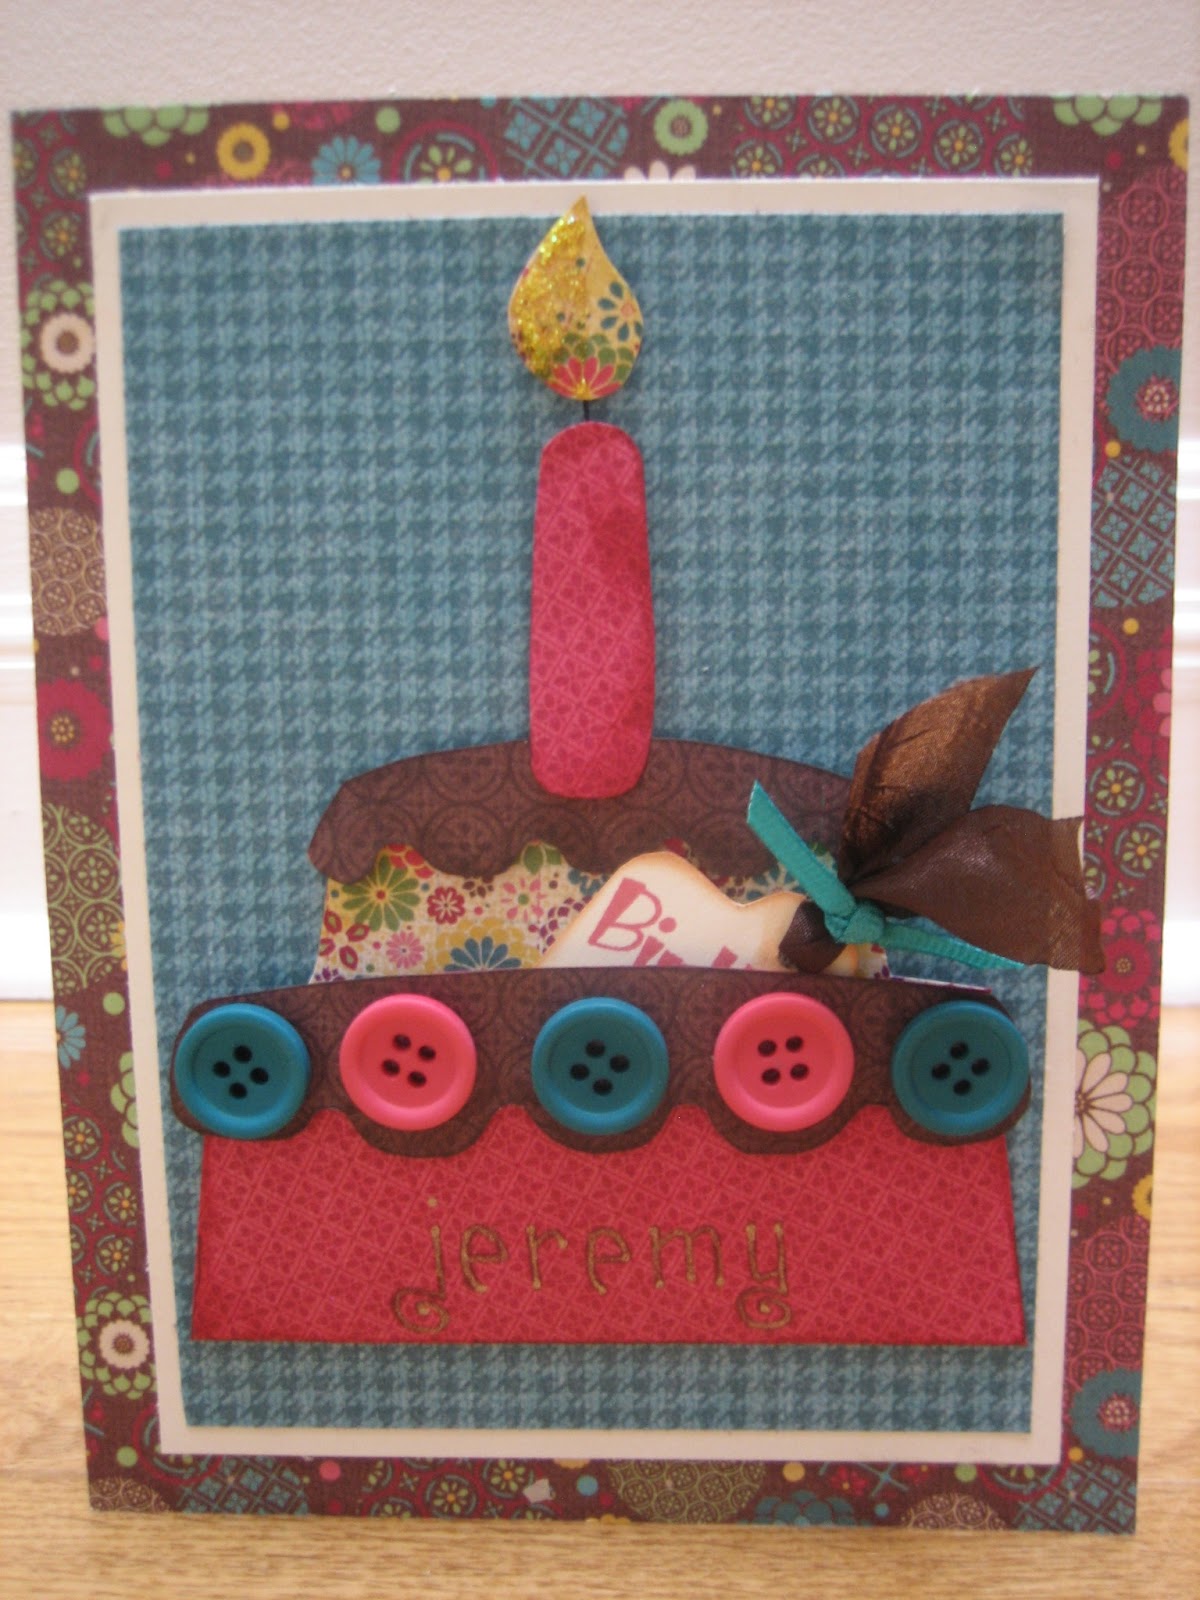
I personalized this card for my dad's upcoming birthday. He and my mum are going to be travelling this summer, so that chevron image on the distressed map paper was perfect.

Here is a close-up of the layered image:

It is very easy to line up the layers, using foam-tape. They are easily squishable so you don't need to worry about extra postage, when sending them through the mail.


One of the more enjoyable parts of this project was distressing the map paper. It used to be white and boring, but I followed the directions, first chalking the piece with green ink, then crumpling it up, then flattening it and rubbing distress ink over the raised parts. I distressed and tore the edges a bit, here and there, too, to make it really antiqued and interesting.

I stamped the birthday wishes using "birthday2celebrate" from The Stamps of Life, and Staz-On ink because of the slick surface of the die-cut.


You can choose to follow the kit's suggested directions faithfully, or ad-lib to your heart's content.
On this card, I switched up the ribbon, added a corrugated star (reminded me of the old Texaco gas sign) and used some of the extra art-work on the sheet--vintage postage stamps, and a luggage label and destination sticker, for the inside of the card.

So, a birthday card taken care of, a new technique learned, and best of all, the creative juices jump-started! What's not to love about kits?

Saturday 5 May 2012

Woo-hoo! Happy National Scrapbook Day!

Seafood findings from Summer 2011 Vacation
I don't honestly know if NSD counts in Canada, too, but any excuse for a posting, right?

SO, there hasn't been much activity on my sad little blog, as I was a sad little person for about 10 days with a bacterial infection. So much worse than a virus! But all better now, thanks to antibiotics, and raring to go back to paper-crafting activities.

Here is yet another lay-out from our vacation last summer, illustrating what I consider to be the real purpose of scrapbooking: preserving and commemorating great moments in personal history. To that end, the "decorating" does not have to be excessive. This is a pretty simple lay-out, featuring the photos above all, with a generous dose of journalling to confirm the who/where/what/why. Enlargements of the picture sometimes create enough detail. 


The main focus on this page was the excellent fish&chips place we discovered, so that receives a little extra attention with the addition of a photo-mat and twine border:


Simplicity aside, I did have fun with the title and embellishment on this page.
The punny title was created by first die-cutting the letters (this is Sizzix "Chunkedelic" font, sadly retired, but probably available on Ebay), then running them through an embossing folder, then high-lighting them with an ink pad to emphasize the embossing. You have to die-cut first and emboss second; the dies will flatten during the embossing process if you try it in the reverse order.


This yummy little image comes from the Cricut cartridge called "Go Canada!"  It is a paper-pieced poutine--how funny! It was NOT the most intuitive thing I've ever tried--figuring out the optimal size, the orientation in which it would be cut on the mat, the correct pressure for the different paper types I used...a LOT of trial and error. BUT what a perfect companion to the EXCELLENT fries made with PEI potatoes, which you know were in the ground the day before they were cooked...so fresh!


Couple of final photos showing the individual pages, so you can see the details in the photos, all the better to plan your next summer trip to "The Island..."

Hope your day features some scrapbooking!

Enjoy!